 Silicone Manufacturer for Custom Silicone Products
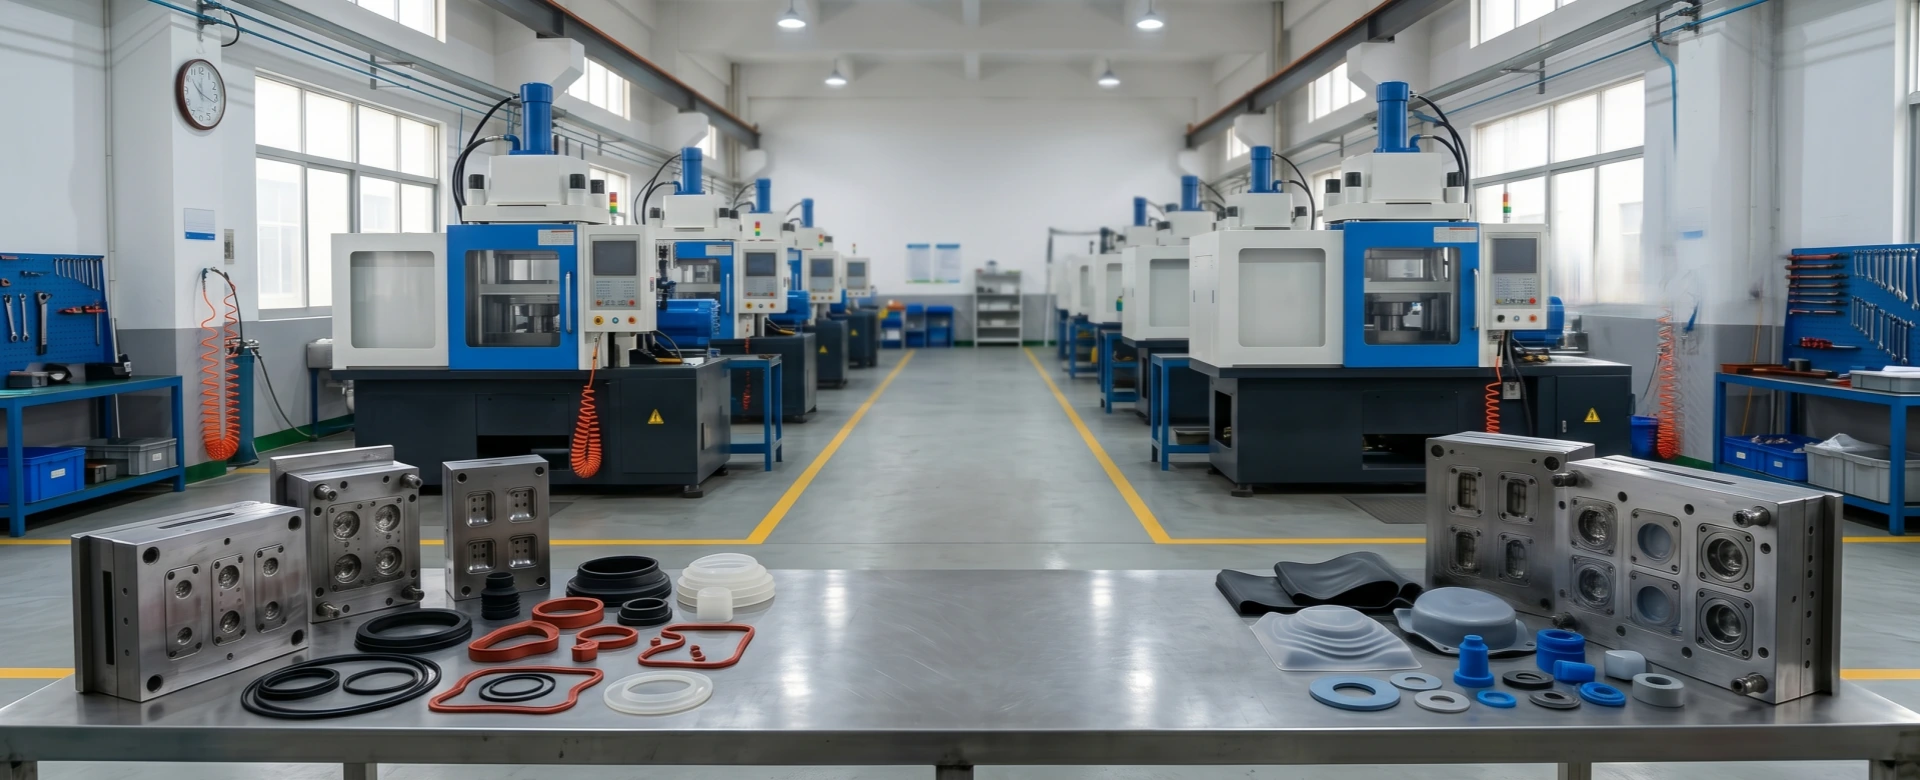
Direct answer: A typical silicone compression molding cycle for solid high-consistency rubber includes material and batch confirmation, preform weighing and cutting, mold preparation, preform loading, controlled mold closing and venting, heat-and-pressure curing, mold opening, demolding, trimming, optional secondary processing, inspection, and packing.
The actual cycle is not one fixed number. It changes with part thickness, silicone compound, cure system, cavity layout, mold temperature, venting, demolding difficulty, and the inspection standard required for the project.
For a buyer, product engineer, or sourcing manager, understanding the silicone compression molding cycle is useful for more than learning how a press operates. Each stage affects the quotation, sample quality, dimensional consistency, flash level, appearance, rejection risk, and production capacity of a custom silicone part.
Reemane supports custom silicone compression molding projects based on STEP files, 2D drawings, physical samples, product photographs, dimensions, or early-stage product concepts. Before tooling, we review the part structure, material direction, hardness, parting line, expected quantity, and functional requirements so the production cycle can be planned around the actual project rather than a generic process assumption.
Silicone Compression Molding Cycle at a Glance
Material Confirmation → Preform Preparation → Mold Preparation → Preform Loading → Closing and Venting → Curing → Mold Opening → Demolding → Trimming and Secondary Processing → Inspection and Packing
Why the Compression Molding Cycle Matters to Custom Silicone Buyers
The unit price of a molded silicone part is influenced by more than raw material weight. The number of cavities, labor required for loading and demolding, cure time, trimming difficulty, inspection time, and expected rejection rate all affect production cost. Two parts with similar weights can therefore have very different quotations.
The cycle also explains why a sample that looks acceptable is not automatically ready for stable mass production. A supplier may be able to produce several good samples by adjusting loading position, cure time, or manual trimming. The more important question is whether the mold and process can repeat the result across many cycles without excessive operator correction.
For this reason, Reemane evaluates the complete manufacturing path before confirming tooling and production direction. The goal is not simply to fill a mold cavity. The goal is to create a repeatable process that matches the approved sample and the agreed inspection requirements.
Step 1: Confirm the Silicone Compound and Batch Conditions
The molding cycle begins before the mold is opened. The silicone compound must match the application, hardness, color, cure system, and documentation requirements of the project. Different formulations can behave differently during flow, venting, curing, release, and post-curing.
Important points to confirm include:
- Silicone type and intended application
- Target Shore A hardness
- Color or Pantone direction
- Platinum-cured or peroxide-cured material direction, when relevant
- Required material or test documentation
- Storage condition and material batch identification
A material change can require a new process adjustment even when the mold remains the same. Hardness, flow behavior, cure response, pigment loading, and release behavior may change the suitable preform shape, venting sequence, cure time, and demolding method.
Step 2: Prepare the Silicone Preform
In compression molding, the uncured solid silicone is prepared as a measured charge, commonly called a preform. The preform is cut or shaped so it can be placed in the mold cavity before the press closes.
Preform control affects several common production outcomes:
- Too little material: short fill, incomplete edges, thin sections, or missing details
- Too much material: excessive flash, difficult mold closing, longer trimming time, and material waste
- Poor preform position: uneven flow, weld or knit areas, trapped air, and inconsistent cavity filling
- Inconsistent preform weight: variation in part weight, flash, dimensions, and appearance between cycles
The correct preform is not determined by part weight alone. Its shape and placement should also support balanced material flow. A long sleeve, a thin membrane, a deep cap, and a flat gasket may require different loading strategies even when their finished weights are similar.
Buyer takeaway: If a quotation is based only on product weight without reviewing the drawing, cavity layout, flash area, and demolding method, the production cost may be underestimated.
Step 3: Prepare and Stabilize the Mold
Before loading, the mold surfaces and cavities must be ready for a repeatable cycle. The required preparation depends on the product, mold condition, surface texture, and material behavior.
Typical checks include:
- Cavity cleanliness and absence of cured residue
- Condition of vents, parting surfaces, cores, and locating features
- Mold temperature stability
- Correct insert or core placement, when the part includes inserts
- Condition of any release method approved for the product
- Confirmation that cavities are not damaged or blocked
Mold temperature should be controlled rather than judged only by the press setting. A cold startup mold, a fully stabilized mold, and a mold that has been open for an extended interruption may not produce identical results with the same nominal timer setting.
Step 4: Load the Preforms into the Mold
The operator places the prepared silicone charges into the planned cavity locations. Loading must be consistent in quantity, orientation, and timing, especially in multi-cavity molds.
Loading becomes more demanding when the part has:
- Large differences between thick and thin sections
- Deep cavities or tall cores
- Long flow paths
- Thin lips, membranes, or sealing edges
- Multiple inserts or internal features
- Several cavities that must fill at the same time
Fast loading is useful only when it remains controlled. If the mold stays open too long, the first loaded cavities can begin heating before the final cavities are loaded. If preforms shift while the mold closes, flow may become unbalanced.
Step 5: Close the Mold and Release Trapped Air
After loading, the press closes the heated mold and applies pressure. As the silicone deforms and flows, air must escape through the designed vents and parting areas before the compound seals those paths.
Depending on the mold and part geometry, the process may use a controlled closing sequence or one or more brief venting actions. The correct approach depends on the cavity design, material flow, cure response, wall thickness, and risk of trapped air.
Poor air release can contribute to:
- Surface bubbles or voids
- Incomplete detail reproduction
- Burn marks or trapped-gas marks
- Weak areas near flow fronts
- Short fill in remote or thin features
Venting is a tooling and process issue together. Increasing pressure or adding more material does not automatically solve an air-trap problem. In some cases, those changes can make flash or trapped-gas defects worse.
Step 6: Cure the Silicone Under Heat and Pressure
Once the mold is closed, heat and pressure are maintained while the silicone crosslinks into the final elastic part. The required cure time depends on the selected compound, cure system, mold temperature, part thickness, cavity geometry, and required physical performance.
The thickest functional section often controls the minimum cure time. A thin outer wall may appear cured while a thick internal area still needs more time. Conversely, extending the cycle without reason reduces output and may influence color or material properties depending on the formulation and application.
Cycle development should therefore balance:
- Complete cure through the relevant cross-section
- Stable dimensions after demolding
- Acceptable surface and color
- Practical demolding without tearing
- Production output and cavity utilization
- Any required secondary cure or conditioning
There is no responsible universal statement such as “all silicone parts cure in the same number of seconds.” A small flat washer and a thick protective boot should not be planned with the same assumptions.
Step 7: Open the Mold at the Correct Time
When the planned cure stage is complete, the press opens the mold. Opening too early can leave the part under-cured, soft, dimensionally unstable, or easily damaged. Opening later than necessary can reduce productivity without improving the part.
The mold opening method must also protect delicate features. Thin lips, undercuts, long cores, deep cavities, and soft compounds can require slower or more controlled release than a simple flat part.
Step 8: Demold the Silicone Part
Demolding is one of the most underestimated parts of the silicone compression molding cycle. A part can fill and cure correctly but still be difficult to remove without stretching, tearing, distortion, or surface marks.
Demolding difficulty is influenced by:
- Undercuts and negative geometry
- Depth of the cavity or core
- Draft and release direction
- Wall thickness and local weakness
- Hardness and tear resistance of the compound
- Surface texture and cavity finish
- Location of the parting line and allowed handling area
A design that requires aggressive manual pulling may slow the cycle and create variation between operators. During DFM review, the product geometry should therefore be evaluated not only for filling, but also for realistic and repeatable removal from the mold.
Step 9: Trim Flash and Complete Secondary Processing
Compression-molded silicone parts normally require some level of flash removal or edge finishing. The amount and location of flash depend on mold design, parting line, preform control, clamping condition, material flow, and the approved appearance standard.
Possible post-molding operations include:
- Manual or mechanical flash trimming
- Hole opening or removal of designed process material
- Cleaning
- Post-curing when required by the compound or application
- Printing, marking, or logo processing
- Assembly with another component
- Special packaging to prevent deformation or contamination
These operations must be included in quotation planning. A part with a low press cycle time can still be expensive if trimming, inspection, assembly, or packaging requires substantial labor.
Step 10: Inspect the Part Before Packing
Inspection should follow the agreed drawing, approved sample, and project-specific acceptance criteria. Not every dimension needs the same inspection frequency, and not every visible mark affects function. The important step is to define what is critical before production.
Typical control points include:
- Critical dimensions and fit-related features
- Part weight when it is a useful process indicator
- Hardness or material confirmation according to the project plan
- Flash, tear, short fill, bubbles, contamination, and surface condition
- Color and appearance against the approved standard
- Functional fit, sealing, grip, retention, or assembly testing
- Packaging quantity, label, and deformation protection
For a custom project, the inspection plan should focus on the dimensions and defects that can cause actual failure. This is more useful than applying the same generic checklist to every silicone product.
What Determines the Total Silicone Compression Molding Cycle Time?
The total cycle includes more than the press curing timer. Buyers should consider the complete time required to produce one mold shot:
- Prepare and verify the preforms
- Open and clean the mold when required
- Load every cavity
- Close and vent the mold
- Cure the part
- Open the mold
- Demold every cavity
- Prepare the mold for the next shot
Important cycle-time drivers include part thickness, cavity count, material system, mold temperature, number of inserts, venting sequence, demolding difficulty, flash removal, inspection level, and operator accessibility.
This is why the fastest cure setting does not always create the lowest unit cost. A design with easier loading, balanced filling, clean parting lines, and reliable demolding may produce a lower total cost even if the nominal press time is slightly longer.
Common Defects and the Cycle Stage to Review
Short Fill or Missing Details
Review preform weight and position, flow path, venting, mold temperature, closing sequence, cavity balance, and whether thin sections are practical for the selected compound.
Excessive Flash
Review preform weight, parting-surface condition, mold fit, clamping condition, material flow, vent design, and whether the accepted flash standard was clearly defined.
Air Bubbles, Voids, or Gas Marks
Review preform placement, trapped-air locations, venting, closing sequence, cavity geometry, contamination, and cure behavior. Do not assume that adding pressure alone will solve the cause.
Tearing During Demolding
Review undercuts, wall thickness, core depth, release direction, surface texture, cure completeness, material tear strength, and the manual handling method.
Dimensional Variation
Review material batch consistency, preform control, mold temperature stability, cure condition, demolding deformation, post-cure effect, measurement timing, and fixture or gauge method.
Color or Surface Variation
Review pigment mixing, contamination control, mold cleanliness, release practice, cure condition, surface texture, and the visual approval standard.
DFM Questions to Resolve Before Building the Mold
A strong silicone compression molding cycle is usually designed before the first sample is made. The following questions should be reviewed during tooling evaluation:
- Where can the parting line be placed without affecting function or appearance?
- Which sections are most likely to trap air?
- Can the part be demolded without tearing or permanent distortion?
- Which dimensions are critical to fit, sealing, grip, or assembly?
- Does the part need a square, circular, or specially shaped preform?
- How many cavities are practical for the expected order quantity?
- Will manual inserts, cores, or secondary operations control the production rate?
- What defect limit and appearance standard will be used for sample approval?
Reemane can review these points during silicone mold development and before the project moves into prototype sampling.
How Reemane Supports Compression Molding Projects
Reemane supports custom molded silicone components for sealing, protection, fitting, insulation, grip, cushioning, and selected consumer product applications. Project support can begin with a finished CAD package or with less complete information.
You can send:
- STEP, STP, IGS, or other available 3D files
- 2D drawings with dimensions and tolerances
- A physical sample for review
- Clear product and assembly photographs
- Basic dimensions and the intended use
- A description of a current leakage, fit, grip, tearing, or production problem
Based on the available information, we can discuss molding feasibility, material and hardness direction, parting line, mold development, prototype sampling, production quantity, and the information still needed for quotation. Learn more about our custom silicone compression molding services and OEM / ODM silicone manufacturing support.
Information Needed for a Faster Project Review
- 3D file, 2D drawing, sample, or clear product photographs
- Product dimensions and critical tolerances
- Target material, hardness, color, and surface requirements
- Operating temperature, contact media, cleaning method, or outdoor exposure
- Functional requirement such as sealing, fit, grip, protection, or insulation
- Prototype quantity, first production quantity, and estimated annual usage
- Required testing, documentation, packaging, or labeling
- Any current defect or reason for changing suppliers
Developing a Custom Compression-Molded Silicone Part?
Send Reemane your drawing, sample, dimensions, application conditions, and estimated quantity. We will review the structure, molding direction, tooling requirements, sampling path, and information needed for quotation.
Download the Reemane Technical Guide
Save, share, or forward the engineering version of this article: Silicone Compression Molding Cycle Control Guide, published by Shenzhen Reemane Silicone Technology Co., Ltd.
Frequently Asked Questions
How long is a silicone compression molding cycle?
There is no single cycle time for every silicone part. The total cycle depends on material, cure system, part thickness, mold temperature, cavity count, venting, loading, demolding, and secondary work. A reliable quotation should be based on the drawing and proposed mold layout.
Why is preform weight important in compression molding?
Preform weight influences cavity filling, flash, material waste, dimensions, and consistency. Too little material can create short fill, while too much can increase flash and trimming time. Position and shape are also important because they control how the silicone flows through the cavity.
Can the molding cycle be shortened after sampling?
Sometimes. Cycle optimization may involve preform preparation, loading method, mold temperature stability, cure time, cavity layout, venting, and demolding. Any reduction should be validated against dimensions, appearance, cure condition, and functional performance rather than judged only by speed.
Does every silicone part need post-curing?
No. The need for post-curing depends on the silicone compound, cure system, application, documentation requirements, and required properties. It should be confirmed for the selected material and project rather than applied automatically to every part.
What information is needed to quote a custom compression-molded part?
The most useful starting information is a 3D file or 2D drawing, material and hardness direction, critical tolerances, application conditions, functional requirements, color, quantity, testing needs, and packaging requirements. A physical sample or clear photographs can also be reviewed.
Can Reemane evaluate a project without a completed 3D file?
Yes. An early review can begin with a physical sample, product photographs, dimensions, a usage description, or a basic concept. Accurate tooling and production quotation normally requires enough dimensional and structural information to define the part and mold.